What’s better than switching to powerful all-in-one imaging software? An easy and stress-free implementation and conversion process! While some systems will take longer, the conversion process requires no downtime for your office and will not impact you. You won’t even know it’s happening!
With our streamlined process, we allow you to maintain productivity for your practice by minimizing any disruption for you and your staff. Throughout this process, we will keep you informed and allow time for review to ensure everything is to your satisfaction.
Some questions you may have could be:
- Will the conversion process impact my practice’s productivity?
- How long will the conversion process take?
- What is my role in the conversion process and what can I expect?
This blog will help clear up any questions you may have to increase your confidence moving forward. Rest assured, Apteryx Cloud Imaging has got you covered!
Who Does The Conversion Process Involve?
Before the first step of the process, it’s important to know who’s involved. Let’s break it down.
Along with your main clinical contacts such as an IT contact or an office staff, Apteryx Cloud Imaging’s following team members will help guide you in this process:
- Implementation Coordinator
- Installation/Conversion Technicians
- Imaging Trainer
Our imaging implementation coordinator will reach out to your point of contact to go over the timeline and responsibility for each role to ensure a smooth implementation process.
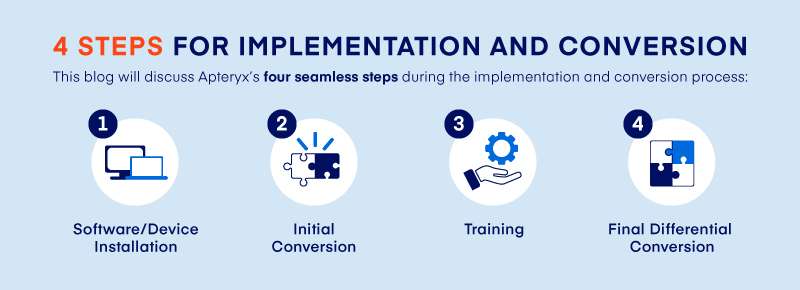
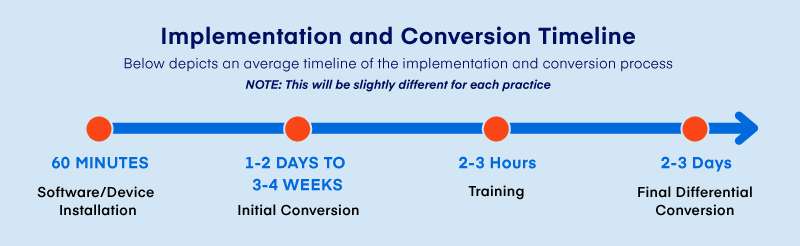
1. Software/Device Installation
The first step in the implementation and conversion process starts with:
- Software Installation
- Capture Device Setup and Testing
This step focuses on installing the imaging software on each imaging workstation with hardware extensions. Installations typically take about 60 minutes and will be conducted by our installation technician.
2. Initial Conversion
This step is the bulk of the process—about 95% of the process is done during the initial conversion. To ensure your office is performing optimally, the initial conversion process is conducted behind the scenes to avoid disrupting your productivity.
How long do conversions take?
This varies across each practice. Depending on the size, connection speed, and which software you’re converting from, this process can take anywhere from 1-2 days to 3-4 weeks.
Initial Database Conversion focuses on converting all imaging data from your previous dental imaging software into your new imaging database. Standard data converted within this step typically includes:
- X-rays
- Scans
- Photos
- Templates
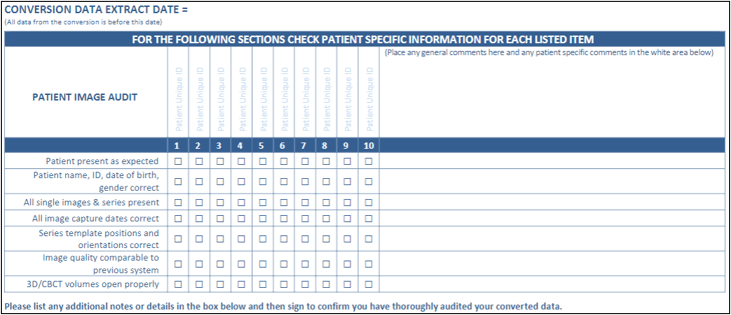
Initial Conversion Auditing focuses on ensuring the data meets your satisfaction. This is a key to successful implementation. We want to make sure you are comfortable and satisfied each step of the way. Your office will be given time to review the data to detect any issues or dissatisfaction.
At this time, our conversion technician will send you an audit form. This form allows you to compare the records between your original imaging system and Apteryx. If there are any issues, it can be documented on this form to be fixed right away.
“Initial conversion takes up 95% of the implementation and conversion process”
Scott SiFerd | Imaging Implementation Manager | Planet DDS
3. Trainings
You’re almost there!
Training details and meeting links will be sent out by our trainers to help guide you through Apteryx Cloud Imaging.
This 2-hour training session is designed to help:
- Understand functionalities and differences between our Capture and Viewer software components
- Capture device operation
- Sensor operation
- Image quality
Standard Training Includes:
- Software Interface
- Device Operation
- Image Enhancements
- Clinical Workflows
- Front Desk Workflows
- Q&A Session
If your practice uses 3D imaging, two training sessions will be conducted. In addition to the standard training, a separate 1-hour training session will be organized to focus on CBCT capture devices.
We highly suggest all staff—such as the front desk, dental assistants, hygienists, and providers—who work with X-rays attend training for optimum results. For additional assistance, supplemental online training videos are available on our website on-demand.
4. Final Differential Conversion
Welcome to the last step!
This quick step serves as a “catch-up” conversion. This process focuses on converting only the new data added to your database after the initial conversion. Since unconverted data is from a much shorter time frame, converted images are generally available within 2-3 days.
The final converted imaging data will then be uploaded to the cloud. To avoid additional conversions, new images should be captured with the new imaging software.
Congratulations, you’re live and ready to go!
Note: In some cases when there’s a change of PMS (Practice Management Software), our conversion technician will perform data mapping
Length of Process
Depending on how many locations you have and what system you’re converting from, your practice can go live in less than a month to 6 weeks. Small practices typically take 1-3 weeks, while larger practices take 4-6 weeks.
Factors affecting the length of the implementation and conversion process include:
- Connection speed
- Age of server
- Size of database
- Type of software you’re converting from
A great advantage during Apteryx’s conversion process is your practice will not be affected to ensure your offices are smoothly operating.
With minimal impact on your practice’s workflow, Apteryx Cloud Imaging’s seamless and transparent implementation and conversion process is conducted in four simple steps to ensure everything is up to your standards.
Missed Part 2? Check It Out Now: 6 Imaging Features To Boost Your Practice – Part 2: Why Apteryx Series
Learn more with our Why Apteryx Series:
Part 1: Top 5 Benefits of Apteryx
Part 2: 6 Imaging Features To Boost Your Practice


